

Everybody installs a Kubernetes cluster on raspberry pi … so why not me … let’s play :)
First of all you’ve to pick your hardware and that’s where you’ve to do some choices. And my choice was to avoid buying a switch because I like it to have less cables and items lying around. Obviously not as reliable but it’s just a game.
Here you can see the difference. This is the only wifi version:


And here is the ethernet version:


So my focus on this post will be on how to make the Kubernetes work on a wifi only setup.
The first step would be to download raspbian you can find it here
You can pick the Raspbian Stretch Lite version.
Flash the micro-sd cards with the image, overwrite everything. Check it out how to do that here. For guys that have a windows machine you can use Win32DiskImager.
Now this will do the trick for the wifi setup:
In the boot disk of the flashed micro-sd card you have to add two files: ssh and wpa_supplicant.conf. ssh is empty and wpa_supplicant.conf must contain your wifi settings. (country code must be correct for your country)
ctrl_interface=DIR=/var/run/wpa_supplicant GROUP=netdev
update_config=1
country=NL

network={
    ssid="your-ssid-name"
    psk="your-password"
    key_mgmt=WPA-PSK
}
Then you can boot your raspberry and see if it comes up. You can use a tool like nmap in order to see it’s IP address. Please change the network range that corrisponds to your wifi network.
nmap -sn 192.168.0.0/24
This should produce a similar output:
Nmap scan report for 192.168.0.100
Host is up (0.079s latency).
MAC Address: <redacted> (Raspberry Pi Foundation)

Nmap scan report for 192.168.0.101
Host is up (0.019s latency).
MAC Address: <redacted> (Raspberry Pi Foundation)

Nmap scan report for 192.168.0.102
Host is up (0.094s latency).
MAC Address: <redacted> (Raspberry Pi Foundation)
Now you should be able to ssh in the host with this command:
ssh pi@192.168.0.100
The default password for raspbian is raspberry (you should change this later on)
This didn’t work for me the first time so I’ll give you some troubleshooting tips:
- If you don’t see the raspberry pi ip address with nmap, just connect a HDMI cable + monitor to your PI. Login with the usual credentials.
- Verify the config file called /etc/wpa_supplicant/wpa_supplicant.conf. Make sure that the file has no strange newlines or such.
- As an alternative you can do all of this with an interactive configuration tool: use sudo raspi-config to start it. Here you can also change the hostname or the network configuration of the pi.
Another step I advise you to do is setting a static ip address. You should edit the file /etc/dhcpcd.conf. Add these lines to each of your pi’s. Please mind that each of them might have different ip values according to your network.
interface wlan0
static ip_address=192.168.0.100/24
static routers=192.168.0.1
static domain_name_servers=192.168.0.1 8.8.8.8 fd51:42f8:caae:d92e::1
To apply the network settings just do a reboot this should then apply them correctly:
sudo reboot
Now your wifi, should be good at this point. Just continue the instructions on this well done blog post on how to install kubernetes on pi. No need for me to repeat the good work. Just mind the weave network setup step it has a typo in it. You can use this command instead:
kubectl apply -f "https://cloud.weave.works/k8s/net?k8s-version=$(kubectl version | base64 | tr -d '\n')"
So if all is good and your kubernetes is up an running let’s just do a final test to see if it works. Execute this command that will create a nginx deployment + service. First create this file nginx-deployment.yaml
apiVersion: apps/v1 # for versions before 1.9.0 use apps/v1beta2
kind: Deployment
metadata:
  name: nginx-deployment
spec:
  selector:
    matchLabels:
      app: nginx
  replicas: 2 # tells deployment to run 2 pods matching the template
  template:
    metadata:
      labels:
        app: nginx
    spec:
      containers:
      - name: nginx
        image: nginx
        ports:
        - containerPort: 80
---
kind: Service
apiVersion: v1
metadata:
  name: nginx-service
spec:
  selector:
    app: nginx
  ports:
  - protocol: TCP
    port: 80
    targetPort: 80
  type: NodePort
Then apply the config with kubectl:
kubectl apply -f ./nginx-deployment.yaml
Verfiy your deployment:
pi@k8s-lord:~ $ kubectl describe deployment nginx-deployment
Name:                   nginx-deployment
Namespace:              default
CreationTimestamp:      Sun, 31 Mar 2019 11:27:58 +0100
Labels:                 <none>
Annotations:            deployment.kubernetes.io/revision: 1
                        kubectl.kubernetes.io/last-applied-configuration:
                          {"apiVersion":"apps/v1","kind":"Deployment","metadata":{"annotations":{},"name":"nginx-deployment","namespace":"default"},"spec":{"replica...
Selector:               app=nginx
Replicas:               2 desired | 2 updated | 2 total | 2 available | 0 unavailable
StrategyType:           RollingUpdate
MinReadySeconds:        0
RollingUpdateStrategy:  25% max unavailable, 25% max surge
Pod Template:
  Labels:  app=nginx
  Containers:
   nginx:
    Image:        nginx
    Port:         80/TCP
    Host Port:    0/TCP
    Environment:  <none>
    Mounts:       <none>
  Volumes:        <none>
Conditions:
  Type           Status  Reason
  ----           ------  ------
  Progressing    True    NewReplicaSetAvailable
  Available      True    MinimumReplicasAvailable
OldReplicaSets:  <none>
NewReplicaSet:   nginx-deployment-56db997f77 (2/2 replicas created)
Events:
  Type    Reason             Age   From                   Message
  ----    ------             ----  ----                   -------
  Normal  ScalingReplicaSet  3h1m  deployment-controller  Scaled up replica set nginx-deployment-56db997f77 to 2
Verfiy the service:
pi@k8s-lord:~ $ kubectl describe service nginx-service
Name:                     nginx-service
Namespace:                default
Labels:                   <none>
Annotations:              kubectl.kubernetes.io/last-applied-configuration:
                            {"apiVersion":"v1","kind":"Service","metadata":{"annotations":{},"name":"nginx-service","namespace":"default"},"spec":{"ports":[{"port":80...
Selector:                 app=nginx
Type:                     NodePort
IP:                       10.97.232.90
Port:                     <unset>  80/TCP
TargetPort:               80/TCP
NodePort:                 <unset>  30681/TCP
Endpoints:                10.38.0.2:80,10.40.0.4:80
Session Affinity:         None
External Traffic Policy:  Cluster
Events:                   <none>
You can see it’s using the node port 30681 that is where I decided to host our service for the demo. Let’s try to navigate to
http://192.168.0.100:30681/ from our local network (same as wifi)
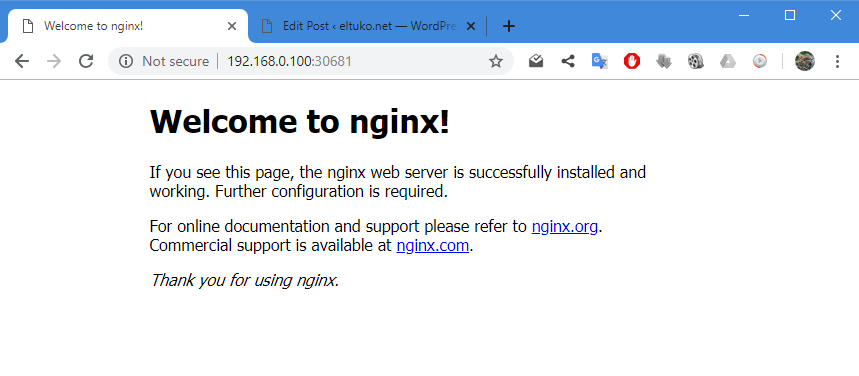
Here we go!
Very interesting and inspirational. This is out of daily job routine what we do mostly. Thanks Andrea.
Regards
Tushar